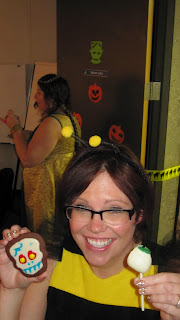
Last night, I prepped for the office potluck - because Todd and I work in the same office, it means that by proxy I have to cook up two items :( But it's all good, because I got to get my spook on with food! I started with Chocolate Sugar Skulls - an adaptation from an old Martha Stewart Recipe for "chocolate sweet hearts" (originally published in Everyday Food January/February 2009). They turned out awesome though and I only got about 2 dozen. I highly recommend this recipe and am scheming how I can do something with them for xmas - possibly with peppermint icing?? Back to Halloween - here's the recipe:
Chocolate Sugar Skulls
Cookie Ingredients:
1 cup flour
1/4 cup Fry's Cocoa
1/2 tsp baking soda
1/4 tsp salt
1/2 cup semi sweet chocolate chips
1/4 cup butter
1/2 cup packed brown sugar
1 large egg
Icing Ingredients:
2 cups icing sugar
2 tbsp meringue powder
4 tbsp warm water
1 tsp vanilla extract (or whatever flavor your would like)
Method:
In a large bowl, mix together dry ingredients and set aside.
In another heat safe bowl (glass or metal), add butter, chocolate chips and brown sugar. Set bowl over top of a pot with simmering water - create a "double boiler" effect. Stir frequently until almost melted. Remove from heat and stir until all the way melted - let cool slightly.
 |
| Home-made double boiler! |
Add the egg to the chocolate mixture. Using a handmixer on low, beat until well blended. Gradually stir in flour mixture - you will be pleasantly surprised to see a dough ball form all on it's own!
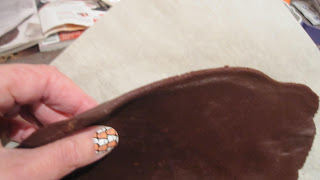
Divide the dough into two and roll out each half onto a sheet of parchment paper. Roll to about 1/4 inch thickness. Transfer to a baking sheet and freeze until firm, about 20 minutes.
Preheat oven to 350degrees. Carefully pull the dough from the paper and put down on a clean work surface (no need to flour if you move quick!) Take your cookie cutter and cut out those shapes, placing on parchment-lined cookie sheets, about 1/2 inch apart. Bake for about 8 minutes until they are firm and "fragrant" - you'll know! Let cool completely before icing!!
To make the icing, simply add all ingredients in a bowl - you can control the consistency with the amount of water you add. As with anything, start with a little and add as you go - you will know when you hit it. I added a lot of vanilla extract, but keep in mind that it did alter the colour a bit - was more beige than stark white.
 |
| Make sure to let the base harden up or set first before decorating! |
Once those cookies are totally cooled off, then you can put your icing into a piping bag and start working on your designs :) **one thing to note, these cookies should be nice and crisp - they were BUT I iced them last night, so by the time lunch rolled around, they were quite soft - they were still really good, but not crispy like I thought they would be - maybe I needed to make the icing a bit more firm. LEARNING!!
For Todd's offering, I made up a batch of my hummus, but presented in a more barfy way.
There were also some really hilarious and creative foods brought in by my co-workers - here are a couple:
 |
| Carol's "meat head" !!! |
 |
| Sheree's cake pop eyeballs! |
 |
| Happy Halloween!!! |


These are way too pretty to be scary! :) Great work decorating.
ReplyDeleteThe skulls look great, and the barfy hummus look so cool!
ReplyDeleteLove the sugar sculls!! Its Day of the Dead here in Mexico tomorrow - I think I might have to try my hand at these!!
ReplyDeleteThey turned out wonderfully! I love all the spooky-themed treats :)
ReplyDeleteWow you are super creative!! Those cookies look amazing! I am going to try your icing recipe when we do our Christmas cookies this year.
ReplyDeleteLove the barfing pumpkin!! Your office is very creative! I will admit the meat head sorta made me lose my appetite!
This looks wonderful. Well done.
ReplyDeleteLOVE those cookies! I am going to have to find an excuse to make those!
ReplyDelete